Princes of the Apocalypse: Random Unusual Weather
Early in Princes of the Apocalypse it is repeatedly suggested that the Sumber Hills have been experiencing unusual weather lately. To reinforce that theme, I developed a set of random unusual weather tables for use while running the adventure.
Random Unusual Weather In Sumber Hills
Roll once per day on each of the tables below to determine how the weather is out of the ordinary. With these tables, there is around a 41% that some sort of strange weather will happen on a given day. If results happen too frequently or infrequently, the DM should feel free to reroll or just decide that something does or does not happen.

Timing
The DM can decide that unusual weather happens at any time during the day, or at multiple times, depending on what makes the most sense with the results on the table and what the PCs are doing. A sudden thunderstorm can break up an otherwise uneventful day of travel, or disrupt a night camping under the stars forcing the PCs to find shelter.
Duration
The duration of the events are also up to the DM’s discretion and what makes the most sense with the results rolled. For instance, unseasonable hot or cold temperatures might last throughout the day (and return to normal the next day), but a tornado is more likely a single event. Because later events in the story tend to amplify the weather and produce greater, longer effects, it’s probably best to keep these random strange weather events limited to a smaller period of time: a sudden, violent storm that develops quickly and stop just as abruptly a few minutes or an hour later; a series of small tremors that last a few minutes and then stop.
Connections To Random Encounters
There are several random encounters (p.30) that, when paired with an appropriate weather event, can help get across the idea that the strange weather is tied to the various cults. For instance, a sudden violent downpour may indicate that nearby is a group of water cultists (“Water cult marauders” encounter) gathered at the shore of a small pond upon which as water priest is conducting a rite of Olhydra. If you roll for random encounters and unusual weather at the start of the day, and both occur, feel free to let one inform the other, e.g., if the random weather is tremors, then instead of using the random encounter rolled, change it to something involving the earth cult (and include a priest or other magic user). Or if the random encounter is fire cult related and something came up when you rolled for random weather, change the weather to unusually high temperatures in the area around the encounter.
Unintentional Connections
Be prepared for your players to draw the wrong conclusions about random strange weather. For instance, if you randomly roll up tremors the same day that they make it to Feathergale Spire, they’ll probably think the Feathergale Knights were responsible. You could mitigate this by having the strange weather correlate more closely with the Haunted Keep that best reflects it (i.e. high winds near Feathergale Spire, downpours closer to Rivergard Keep) but the randomness of the weather and its possible lack of correlation with places the PCs visit may also help hint at the fact that there is something larger happening and many factions at work.
Design Notes
I used the Weather table (DMG p109) as a starting point for this set of tables. You could easily include the light wind/precipitation from the DMG tables in the ones I published above; I opted not to for simplicity and to accentuate abruptness of the unusual weather.
Hoard of the Dragon Queen Chapter 1: Miniatures
If you plan to run Hoard of the Dragon Queen with miniatures, here are a few suggestions on what you might use and how many you’ll need in Chapter 1. The counts are based on the maximum number you’re likely to need at one time, not the total that appear in the chapter.
NPCS
Castellan Escobert the Red
 Dwarf Maulfighter (Desert of Desolation 4).
Unfortunately, this miniature doesn’t have a red beard.
Unless, of course, you repaint it.
Eadyan Falconmoon
 Village Priest (Angelfire 12).
Governor Tarbaw Nighthill
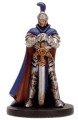
 Purple Dragon Knight (Dragoneye 7) or
Dragon Knight (Dungeon Command: Heart of Cormyr)
Langdedrosa Cyanwrath, Half-Blue Dragon
 Half-Red Dragon Fighter (Tyranny of Dragons 36).
You’ll just have to pretend he’s blue. There don’t appear to be any good prepainted miniature options for a half-blue dragon/dragonborn short of painting one yourself.
Lennithon, Adult Blue Dragon
 Blue Dragon (D&D Attack Wing).
Although a bit small, I like the Attack Wing version of this Blue Dragon because it can be made to fly high over the battlefield by adding multiple pegs (something that’s not possible with the Tyranny of Dragons version).
Linan Swift, her husband, and children
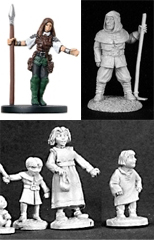 Healer (Archfiends 9)
Man with Hoe (Reaper Townsfolk V)
Townsfolk Children (Reaper)
These reaper minis are metal, not plastic.
Sergeant Markguth

 Human Fighter (Dungeons of Dread 35 or 4eGD4/5 Promo)
Other Creatures
Acolyte (x1)

 Doomdreamer (Legendary Evils 11) or
Cultist of the Dragon (Archfiends 48)
Ambush Drake (x2)
 Guard Drake (Tyranny of Dragons 22).
There is no official 5th Edition Ambush Drake miniature, but the Ambush Drake will do in a pinch. And for the ambitious, you can always repaint it.
Cultist (x7)

 Doomguard (Bloodwar 47)
Shadar-Kai Warrior (Lord of Madness 42)
The cultists are described as not wearing any particular regalia and are made up of, at least in part, mercenaries. These minis seem to fit the bill.
Dragonclaw
 Cult of the Dragon Enforcer (Tyranny of Dragons 20)
Mostly matches the picture on page 71 of Hoard of the Dragon Queen, makes you wonder why the miniature got a different name.
Female Prisoner

 Prisoner (Promo repaint D&DC54) or
Prisoner (Night Below 40)
Guard (x4)
 Caravan Guard (Angelfire 1)
Keep Defenders (x20+)
 Sharn Redcloak (Demonweb 44)
Human Town Guard (Lords of Madness 22)
Dalelands Militia (Archfiends 2)
Greyhawk City Militia Sergeant (Night Below 13)
Human Crossbowman (Dragoneye 5)
City Guard (Giants of Legend 23)
A selection of guard miniatures to man the battlements of the keep. Want their stats to match the minis? Add the following to the Guard statblock:
Armor Class: 16 (chain shirt, shield) or 14 (no shield).
Longbow. Ranged Weapon Attack: +3 to hit, range 150/600 ft., one target. Hit: 5 (1d8 + 1) piercing damage.
Glaive/Halberd. Melee Weapon Attack: +3 to hit, reach 10ft., one target. Hit: 5 (1d10 + 1 slashing damage).
Crossbow. Ranged Weapon Attack: +3 to hit, range 80/320ft., one target. Hit: 5 (1d8 + 1) piercing damage.
Longsword. Melee Weapon Attack: +3 to hit, reach 5ft., one target. Hit: 5 (1d8 + 1 slashing damage or 6 (1d10 + 1) slashing damage if used two-handed.
Kobold (x22)
 Kobold Slinger (DDM4 27)
Kobold Fighter (Tyranny of Dragons 5)
Kobold Soldier (Angelfire 44)
Kobold Skirmisher (Dragoneye 35)
A majority of the time you won’t need more than 5 or so kobolds, but the “Sanctuary” mission involves 22. Although the Kobold stat block is statted out with slings and daggers, I chose to include minis bearing spears/javelins and bows for variety.
If you want the stats to match the minis, just add the following:
Javelin. Melee or Ranged Weapon Attack: +4 to hit, reach 5ft or range 30/120, one target. Hit: 5 (1d6 + 2) piercing damage.
Shortbow/Crossbow. Ranged Weapon Attack: +4 to hit, range 80/320, one target. Hit: 5 (1d6 + 2) piercing damage.
Winged Kobold (x1)
 Dragonwrought Kobold(Dragon Queen 32)
Swarms of Rats (x2)
 Rat Swarm (Pathfinder Skull & Shackles 2) or
Rat Swarm (Savage Encounters 28)
I prefer the paint job and the sculpt of the Pathfinder miniature, but the flatter D&D mini makes it possible to slip the figure underneath another when they’re sharing the same space.
Townsfolk (x6+)
 Anirion Wood Elf (Reaper Bones)
Balto Burrowell Gnome Wizard (Reaper Bones)
Juliette Female Sorceress (Reaper Bones)
Lem Iconic Bard (Reaper Bones)
Mother With Children (Reaper Bones)
Townsfolk: Innkeeper (Reaper Bones)
Townsfolk: Blacksmith (Reaper Bones)
Townsfolk: Grandmother (Reaper Bones)
Townsfolk: Village Rioter (Reaper Bones)
Townsfolk: Strumpet (Reaper Bones)
Townsfolk: Undertaker (Reaper Bones)
Townsfolk: Wench (Reaper Bones)
Man with Hoe (Reaper Townsfolk V)
Man with Sickle (Reaper Townsfolk VIII: Village Mob)
Woman with Rolling Pin (Reaper Townsfolk VIII: Village Mob)
Man with Pitch Fork (Reaper Townsfolk VIII: Village Mob)
The Reaper Bones minis are great for when you need to throw in a few townsfolk (“Seek the Keep”, “Wandering Encounters”, “Sanctuary”). Since they are unnamed NPCs I just use the unpainted miniatures.
The non-Bones minis in the list are made of metal.
Gridded Greenest
If you’re planning on running Hoard of the Dragon Queen and using miniatures, you might considering drawing the encounter locations in Chapter 1 on a wet or dry erase battlemat. To make things easier, I’ve taken the map of Greenest found in the adventure and overlaid a grid to use as a reference for drawing. Each square is 5 feet by 5 feet. The map comes in two versions: one with an all black grid, and a second with a semi-transparent black grid. Both are linked below.

Solid Black Grid
Transparent Black Grid
The map of Greenest in Hoard of the Dragon Queen was illustrated by Jared Blando. You can purchase a high resolution version of it and other maps at his website, The Red Epic.
Using Fortune Cards as Player Rewards
 What Are Fortune Cards?

Fortune Cards were originally released by Wizards of the Coast to support the in-store D&D Encounters program. These cards, sold in random booster packs, provide one-time (mostly combat) benefits to characters when cards are played at the table. Originally intended to serve as a deck that a player draws from once per round, crafty DMs can re-purpose them as a reward mechanic in their 4th Edition D&D games.
Why A Reward Mechanic?
Many DMs like to reward players with something extra when they go out of their way to contribute to the fun at the table. Some award extra experience points, others use bonus Action Points, still others grant bonuses to the next die roll. Fortune Cards offer a fun mechanic for rewarding players in a unique and random way that ties in directly to 4e mechanics. Plus, if you have some around just gathering dust, you might as well get some use out of them.
Getting Started
To construct your reward deck(s), you will need to purchase some Fortune Cards. There were five different sets of card printed: Neverwinter, Shadows Over the Nentir Vale, Fury of the Feywild, Spiral of Tharizdun, and Drow Treachery. You will primarily be interested in getting cards from the Neverwinter, Shadow Over the Nentir Vale, and Spiral of Tharizdun sets, as they are mostly setting/theme agnostic. Each set contains 80 unique cards: 20 designated as common, 20 as uncommon, and 40 that are rare. A standard booster pack for a set contains 8 cards made up of 5 common, 2 uncommon, and 1 rare. A handful of promo card were also printed for each set.
You have a few options as to how to acquire cards:
- Booster Packs: At a suggested retail of $3.99, these packs of 8 cards average to about 50 cents per card.
- Display Box: You can find retailers that will sell an entire display box of Fortune Cards for $40 to $70. A display box contains 24 packs (for a total of 192 cards), so this averages out to about $1.50 to $3.00 per pack (20 to 40 cents per card). It’s a good way to get a lot of random cards at once at a slight discount, but you still won’t get a complete set of unique cards (more than likely you’ll get all of the commons and uncommons, and a third or half of the rares).
- Complete Sets of Common, Uncommon, Rare, or All: Some online retailers as well as sellers on eBay sell complete sets of cards by rarity or even the entire set. This is a practical way to ensure getting all of the unique cards in a set, but you will only have one copy of each at slightly higher cost per card. Complete sets of Common and Uncommon together tend to be around $5.00 (about 12 cents per card), full sets can range anywhere from $60.00-$100.0 ($0.75 – $1.00 per card).
- Individual Cards: Individual cards can be purchase at some online retailers and eBay, which can be useful/economical when trying to complete a set or cherry-pick a few cards from some of the other sets like Fury of the Feywild. Prices vary, but a good baseline seems to be 10 cents for commons, 25 cents for uncommon, and $3.00 for rares.
Constructing Reward Deck(s)
Depending on how many cards you have and personal preference regarding how you want to reward players, there are several ways to set up one or more reward decks for use at the table. I have presented several here, feel free to choose one that suits your play style best (or come up with your own). Regardless of which method of deck construction you choose, you should start by selectively weeding your pool of available cards.
Weeding Out The Duds
Ideally, you want your Fortunate Card rewards to be something interesting and fun that the players can use to gain a leg up in encounters. Since the full run of Fortune Cards covers a wide range of situations and effects, you will more than likely need to pull out those cards that won’t work in your game. Here are a few quick things to look out for:
- Any cards that don’t seem like the players would find very rewarding or useful. (e.g. “Push Through The Crowd”, which allows a character to move through enemies but incurs attacks of opportunity with combat advantage).
- Cards that have very specific conditions under which they can be applied (e.g. “Vicious Shove” which triggers on an enemy succeeding a saving throw to avoid forced moved into hindering terrain).
- If you have a good sense for what your player characters (and monsters they might face) can do, remove any cards that target conditions/abilities that aren’t likely to come into play (e.g. “Brutal Takedown” which requires the ability to daze an enemy). You can always add these cards back in later.
- Any cards that just don’t fit with your game thematically, etc.
Selectively pruning cards in this way will help to ensure that the Fortune Cards you hand out actually feel like rewards (or at least provide new and interesting options).
Option 1: One Reward Deck
This is the easiest reward deck to construct: You simply gather all the cards you plan on using and put them in one shuffled pile. It’s fast and easy to set up, but you may find that drawing from it results in rewards that don’t often match the player’s contributions (for instance, a player may make a huge sacrifice but be rewarded with a common card with a small effect). Also, if you purchased just a complete set of cards, the ratio of common, uncommon, and rare cards will be skewed toward rares (sets contain twice as many unique rares as commons and uncommons). With a little more work you can make it into a deck of all unique cards, or play with the card ratios to affect the distribution of cards.
Variant: All Unique Cards
Constructing the reward deck such that it only has one copy of every card ensures that every reward you hand out, and every card that is played, is unique and different.
Variant: Card Ratios
You can also construct a single deck but use the rarity of the cards to determine how many of each to include in the deck. This of course requires you to have many more cards, but if you bought them in packs or display boxes that shouldn’t be a problem. You can decide on whatever ratio you like, but here are two examples:
- Include 1 of each rare card, 3 of each uncommon card, and 5 of each common card. Since there are more rare cards to choose from (each set has 40 rares, compared to 20 each common and uncommon), the ratio of cards will actually be 2 rares, 3 uncommon, and 5 common per 10 cards.
OR - Include 4 of each common card, 2 of each uncommon card, and choose (or randomly draw) a number of unique rare cards equal to ¼ the total number of common cards you’ve included. This method makes uncommon cards twice as numerous as rares, and common cards twice as numerous as uncommon (and four times as numerous as rares), but still keeps the total deck size somewhat reasonable.
Again, the reward a player gets from the deck is random (in terms of how powerful it is), though in this case you are setting the power ratio of reward cards in the deck.
Option 2: Multiple Decks, Sorted By Rarity
If you want more control over the power of the rewards you’re handing out, you can opt to create multiple decks sorted by rarity (e.g. a common deck, an uncommon deck, and a rare deck). When it comes time to hand out a reward, you choose which deck to pull from based on how great of a reward you think they have earned. You can use all of your cards, can make each deck contain only unique cards, or play with the ratio in each deck to control how many copies of a card are out at one time.
Card Ratios
If you want duplicate cards at the table, but want to control the frequency of cards based on their rarity, do the following: In your common deck, include 4 of each common card. In the uncommon deck, include 2 of each uncommon card. In the rare deck include 1 of each card. Since you are determining the rarity of cards at the table by rewarding the players based on merit, these ratios instead control the likeliness that more than one person at the table gets the same card. Another formula would be to include 1 less than the number players of each common card, and half that number of uncommon, and one rare.
Option 3: Multiple Custom Decks (Ignoring Rarity)
This method takes the most time and effort to construct the decks, but gives you the most control (and is my current preferred setup). Although the rarity assigned to each Fortune Card gives some sense of its power, it doesn’t always correlate with how good the card is from a player’s perspective. The play style of you and your players may make some cards better or worse than the rarity suggests. For example, a rare card that provides bonuses on opportunity attacks isn’t very valuable if, as a DM, your monsters rarely provoke attacks of opportunity. With that in mind, you can take the time to go through all of your cards and sort them into a few categories based on how valuable you think they actually are, without regard to rarity.
Here are the categories/decks I’ve sorted my cards into:
- Average: These are cards that have a decent benefit, but perhaps not as good as some of the other cards. These cards tend to be more conditional (that is to say, they don’t just provide a blanket bonus for free) or they require the player to take some kind of penalty or disadvantage to one thing in order to gain a bonus in another. Cards of the latter type are often categorized as rare but I consider them less valuable to players than a card that just provides a straight bonus with no caveats.
Examples:- “Shifty Moves” – Allows you to shift 1 square as a minor action. This could come in handy, but isn’t something that’s good no matter the situation.
- “Think Again” – Grants you +4 bonus to defense against an opportunity attack. This is conditional, it requires an opportunity attack.
- “Keep At It” – Allows you to reroll an attack roll, but you take damage equal to your level. This card is useful, but comes with a cost.
- Good: These are the cards that either always provide a benefit with no prerequisites, or require common enough circumstances as to be good in most combats. It may be easiest to decide what constitutes a good card first and then what makes an average card by comparison.
Examples:- “Impervious” – Allows you to turn a critical hit into a normal one. This is conditional (you have to be hit with a critical) but provides a considerable benefit.
- “Fair Fight” – +2 bonus this turn to attack rolls of your At-Will powers.
- Gambler: This is contains all the cards whose outcome depend on either a simple 50/50 die roll or provide a benefit for success and a penalty for failure on a die roll. I decided to put these in a separate deck based on my players–some find the idea of taking the risk to reap the reward interesting, others like to play it safe and would be less inclined to risk it. Putting these cards in a separate deck allows me hand out these types of cards only to players who I think will be likely to use them.
Examples:- “Gambler’s Eye” – Roll a d20, on 1-9 you take -2 to attack rolls until end of this turn, 10-20 you gain +2 to attack rolls. 55% of the time this works in the player’s favor, but it’s not guaranteed.
- “Seize the Opening” – When an ally adjacent to you misses on an attack you can shift 1 square and make a basic attack for free, but if you miss, that ally takes damage equal to your level. Here there is a benefit but also a cost associated with failing a die roll.
It should be pointed out that even though I sorted the cards based on usefulness, I still tried to make sure that all of the cards were useful in some way, there are just some that provide a better benefit than others.
Additional Decks
The Fortune Card sets Fury of the Feywild and Drow Treachery are generally not well-suited for inclusion in the reward decks because of their themes and mechanics–magical effects in the former and “harm another character” in the latter–though one could cherry pick a few here and there. However, they could be used as their own special reward decks if they meet the theme of your game (an evil drow campaign, for instance). The Fury of the Feywild set contains many magical and unusual effects which are not well suited for all classes, but could make interesting rewards for magical or fey characters in your game. And of course if you’re running an adventure in the Feywild, you could give these rewards to any character, explaining the effect as being tied to the environs. It probably isn’t worth the time and effort to sort these themed decks into multiple ones based on rarity. Instead, choose one of the methods above for creating a single deck instead. The randomness of the draws fits with the flavor of the deck.
Reward Cards In Play
Now that you have a deck or decks from which to draw cards, here are a few rules for using them in play. You should modify these in any way works best for your game. Note that we are disregarding the standard rules by which Fortune Cards were used during D&D Encounters as we are re-purposing them to fit our needs.
When a player has earned a reward, draw a reward card from one of your reward decks and hand it to them. If you are using multiple decks, choose the one that best reflects how powerful a reward (or whatever criterion you’ve used to sort your decks) you think they deserve.
The player that receives the card can immediately choose to:
- Keep it.
- Give it to another player.
- Discard it and draw another if the player genuinely cannot use the card (e.g. it relies on an effect they cannot produce, like daze).
- Optional: Discard it and draw another if the player already has a copy of that card.
Rule 2 can be explained in-game as the receiving player emboldened or awed by the deeds of their fellow adventurer. As a game mechanic, it allows players to spread out rewards among the party and help their allies, or distribute rewards to players who could best use them.
During play, the following rules apply:
- Once a player has made the initial decision to either keep or give a card to another player, reward cards cannot be traded or passed between players.
- A player can play only one Fortune Card per turn, but there is no limit to the number that can be played per encounter.
- If a player has 5 cards, do not reward any more cards. You can optionally allow them to discard a reward to get under 5. Five is an arbitrary number, chosen simply to make the number of cards in front of a player manageable.
- You can optionally force a discard of reward cards at certain intervals if you want to attempt to encourage quick use of cards. This depends greatly on your game. One possible interval would be at the end of each encounter.
What Earns A Reward
It is up to you as the DM to decide what your players have to do to earn a reward. There isn’t a right or wrong way to do this. Here are a few actions in and out of the game that you might consider worthy of a reward. If you are using a rarity scheme, it’s up to you to decide what their effort is worth:
- Making you or the table laugh.
- Consistently helping with a task (tracking initiative, etc.)
- Getting food for the group.
- Being on time and ready to play.
- Completing a quest.
- Roleplaying.
- Doing something not because it’s the ideal choice, but because it’s the one that makes most sense for their character.
- Making a sacrifice in the name of roleplaying.
- Contributing to the campaign wiki.
- Doing something awesome and inspiring in game.
- Enhancing the game in any way.
- Impressing you.
This is just a small list of examples to get you thinking about rewards, but ultimately it’s easier than following a list: just go with your gut. Any time you feel like someone at the table deserves a little something extra for whatever reason, hand them a card.
Caveats
This is by no means a perfect or be-all and end-all solution to player rewards. Here are a few things to note:
- Fortune Cards were designed for use during combat encounters and as such contain benefits that are rarely useful outside of combat. If you want to provide benefits for the overall game instead of just one part of it, you have a few options. You could introduce a rule that outside of combat a Fortune Card can be redeemed for some blanket effect (e.g. an automatic 10, a bonus, or a reroll of a skill roll) or some similar mechanic. You could also make your own reward cards (printed on card stock, taped to unused cards, or printed by an on demand card company like Superior POD) and shuffle them in with the others.
- 4th Edition D&D already provides a large number of tactical options to players, so including another hand of cards for them to factor into their decision-making can potentially slow the game down or add unwanted complexity for some players. I wouldn’t suggest using them right away with new players or a new group to prevent information overload. With an establish group, try them out for a few sessions and then ask your players if they like the mechanic or if it adds too much overhead.
- My suggestions for how to use Fortune Cards as player rewards are just that: suggestions. If you like the concept, run with it. Change it in whatever way works best for your game.
Dungeon Command By The Numbers: Tyranny of Goblins Creature Stats
 Here are some stats on the creatures that appear in the Dungeon Command: Tyranny of Goblins faction pack, alongside the previous two packs, Heart of Cormyr and Sting of Lolth. For a little background on what I’ve done here, check out my Dungeon Command By The Numbers: Creature Stats post.
| Heart of Cormyr | Sting of Lolth | Tyranny of Goblins | |
|---|---|---|---|
| Combined Hit Points: | 660 | 690 | 730 |
| Combined Melee Damage: | 230 | 220 | 210 |
| Combined Missile Damage: | 90 | 60 | 40 |
| Creatures With Missile Attacks: | 5 | 4 | 2 |
| Speed 5 Creatures | 4 | 0 | 0 |
| Speed 6 Creatures | 4 | 7 | 9 |
| Speed 7 Creatures | 4 | 3 | 1 |
| Speed 8 Creatures | 0 | 1 | 2 |
| Speed 10 Creatures | 0 | 1 | 0 |
| Average Speed | 6 | 6.75 | 6.42 |
| Level 1 Creatures: | 3 | 2 | 3 |
| Level 2 Creatures: | 3 | 3 | 1 |
| Level 3 Creatures: | 2 | 3 | 4 |
| Level 4 Creatures: | 2 | 3 | 2 |
| Level 5 Creatures: | 1 | 1 | 1 |
| Level 6 Creatures: | 1 | 0 | 1 |
| Combined Level of Creatures | 34 | 34 | 36 |
| Creatures With Dex: | 5 | 12 | 7 |
| Creatures With Str: | 8 | 1 | 2 |
| Creatures With Int: | 2 | 1 | 1 |
| Creatures With Wis: | 1 | 1 | 0 |
| Creatures With Con: | 4 | 0 | 5 |
| Creatures With Cha: | 0 | 0 | 4 |
| Creatures With Two Skills: | 6 | 3 | 5 |
| Creatures With Three Skills: | 1 | 0 | 1 |
| Creatures With Powers That Do Melee Damage: | 3 | 3 | 3 |
| Combined Melee Damage From Powers: | 30 to 100 | 50 | 30 |
| Creatures With Powers That Do Ranged Damage: | 1 | 0 | 0 |
| Combined Ranged Damage From Power: | 20 to 120 | 0 | 0 |
| Creatures With Deploy Powers: | 1 | 2 | 1 |
| Creatures With Burrow/Fly: | 2 | 1 | 1 |
| Creatures With Slide Powers: | 1 | 1 | 0 |
| Creatures With Shift Powers: | 0 | 4 | 0 |
| Creatures With Heal/Reduce-Damage Powers: | 3 | 0 | 2 |
| Combined Healing/Damage-Reduction From Powers: | 30 to 100 | 0 | 20* to 100+* |
| Creatures With Powers That Tap Enemy: | 0 | 0 | 2 |
* Special ability grants Prevent 10 to creatures on board with certain keywords. Upper bound based on number of creatures in set.
Dungeon Command By The Numbers: Order Cards
 In my previous Dungeon Command By The Numbers, I crunched the numbers on the creatures in the first two factions packs (Heart of Cormyr and Sting of Lolth) for the new D&D miniatures skirmish game. But creatures only make up half of a warband. The other element of play are the order cards which allow you to command your creatures to perform special abilities. Again, I’ve crunched some numbers to give custom content creators something to start with.
Levels
Order cards range in level from 1 to 6. For the two released sets, a majority of the cards are level 1 or 2 (see stat breakdown below). The combined level of the 36 order cards in each set is 66 (Cormyr) and 68 (Lolth).
Number of Cards
The two released sets have 36 order cards each. Hearty of Cormyr has 14 unique cards and 11 cards that appear twice. Sting of Lolth has 8 unique cards and 14 pairs of cards that appear twice.
Required Stat
For a creature to use an order card, it must be of the same level or higher and be based on the same stat. The stat required for order cards largely depends on the effect and the theme of the deck/warband. The breakdown for the two released warbands appears below–Cormyr is mostly based on STR with a couple of INT, and Lolth relies heavily on DEX with a few INT and WIS. Neither have CON or CHA cards/creatures, both of those will appear in future faction packs. Both sets have a few cards that can be used by any creature.
Type
Powers can be Immediate, Standard, or Minor. Creatures generally only have one Standard action on their turn and one Immediate action on the opponent’s turn (in both cases they “tap”), but any number of Minor actions on their turn.
Powers
Much like creature powers, the balance of command card powers and the interaction among the various characteristics of a command power (i.e. level, stat, and type) are known only to the designers. As more sets are available we should be able to form a clearer picture of how to balance our own custom powers. I have pored over the available command cards, however, and made a few conclusions. Keep in mind that these are based on the small set of available data and could be wildly inaccurate.
Powers that Prevent Damage
So far, powers that prevent damage appear at level 3 or lower. They are all Immediates and almost always tied to a stat.
- If the power does nothing but allow a creature to prevent damage to itself from any one source, the baseline appears to be:
- 1st Level Power: Prevent 20 damage from any one source. (see “Intercept”)
- 2nd Level Power: Prevent 30 damage from any one source.
- 3rd Level Power: Prevent 40 damage from any one source. (see: “Close Call”)
- If the power has some restriction, like prevent damage to an adjacent creature, or allowing the opponent to draw a card, the amount increases by 10 (see: “Defend Ally”, “Recoil”)
- If the power allows the creature to also make a melee attack, the combination of the damage prevented to the creature and the melee damage it does generally adds up to the baseline above. So, a second level power that would prevent 30 damage can prevent 20 damage and allow a melee attack that does 10 damage. (see “Seize the Opportunity”, “Riposte”)
- If the power allows the creature to untap, it prevents 10 less damage. (see “Near Miss”)
- If the power allows the owner of the creature to draw an order card, it prevents 20 less damage (see “Parry”).
Powers That Heal
There are only two card thus far (“Healing Potion”, “Invigorating Smash”) that heal damage, and one that removes an attached card (“Saving Throw”). Healing is likely 20 points of damage per level, and by itself is a Minor action.
Powers That Grant Movement
Shifting, moving a creature’s speed, and sliding (forced movement), all appear as various 1st level Minor action powers (see “Stalk”, “Into the Fray”, “Shove Aside”).
Powers That Do Damage
Powers that do damage are generally Standard actions and, in most cases so far, grant melee attacks. Powers with Minor action attacks (see “Quick Jab”, “Quick Shot”) generally just grant an additional basic creature attack (and are 1st level). Damage-dealing Standard action powers come in two forms: those that deal fixed damage, and those that add a bonus to the damage a creature does with its basic attack. Some observations:
- Standard action, grants a melee attack that does damage, or the creature’s basic attack with bonus damage, and sometimes other effects.
- Whether fixed damage, or bonus damage, the amount is generally 20 per level (see “Power Attack”, “Killing Strike”).
- If the power also allows a shift or slide, or similar simple effects, the amount is general 10 damage less (see “Shadowy Ambush”, “Blast of Force”).
- If the power also heals, the damage might be less the heal amount (see “Invigorating Smash”)
- If the power allows nearby creatures to assist, it might do 20 less damage (see “Sneak Attack”)
- If the power also allows a creature to untap, or forces the enemy to discard, it might do 30 damage less (see “Daring Attack”, “Disrupting Attack”).
- If the creature’s owner must discard a card, it might add 10 damage (see “Sacrifice”).
- Attacks that target multiple enemies might only do 10 damage per level (see “Fireball”).
Order Cards By The Numbers
Finally, here are some statistics about the order cards for the two released faction packs.
| Heart of Cormyr | Sting of Lolth | |
|---|---|---|
| Unique Cards | 14 | 8 |
| Duplicates Cards | 11 pairs | 14 pairs |
| Level 1 | 19 | 13 |
| Level 2 | 9 | 17 |
| Level 3 | 4 | 5 |
| Level 4 | 3 | 0 |
| Level 5 | 1 | 0 |
| Level 6 | 0 | 1 |
| Str | 19 | 0 |
| Con | 0 | 0 |
| Dex | 2 | 27 |
| Int | 6 | 4 |
| Wis | 0 | 3 |
| Cha | 0 | 0 |
| Any | 9 | 2 |
| Allow Assist w/o Requirements | 0 | 1 |
| Standard | 12 | 15 |
| Immediate | 9 | 10 |
| Minor | 15 | 11 |
| Do Melee Damage | 14 | 13 |
| Combined Melee Damage | 410* | 320* |
| Do Ranged Damage | 3 | 1 |
| Combined Ranged Damage | 30 to 750* | 20 to 500* |
| Do Ongoing Damage | 0 | 2 |
| Combined Ongoing Damage Per Turn | 0 | 20 |
| Do Bonus Damage | 0 | 2 |
| Combined Bonus Damage | 0 | 20 |
| Do Unpreventable Damage | 0 | 2 |
| Heal | 1 | 0 |
| Combined Heal Amount | 20 | 0 |
| Prevent Damage | 10 | 8 |
| Combined Damage Prevented | 240** | 180** |
| Gain Morale | 1 | 0 |
| Combined Morale Gained | 4 | 0 |
| Deploy | 2 | 1 |
| Move | 2 | 0 |
| Shift | 0 | 7 |
| Slide | 4 | 0 |
| Immobilize | 0 | 2 |
| Attach To Own | 6 | 2 |
| Attach To Opponent | 0 | 6 |
| Remove Attached | 2 | 0 |
| Level Up | 1 | 0 |
| Untap | 4 | 2 |
| Tap Opponent | 2 | 1 |
| Draw Order Cards | 2 | 6 |
| Discard Order Cards | 0 | 3 |
| Opponent Discard Order Cards | 2 | 0 |
| Opponent Draw Order Cards | 1 | 0 |
| Requires Adventurer | 2 | 0 |
| Requires Drow | 0 | 2 |
| Requires Evil | 0 | 1 |
| Requires Humanoid | 2 | 2 |
| Requires Spider | 0 | 2 |
| Requires Ranged | 2 | 0 |
* Some cards simply allow an attack or do damage in addition to weapon damage which varies by creature.
** Two cards prevent all damage to a creature.
Dungeon Command By The Numbers: Creature Stats
 Dungeon Command is Wizards of the Coast’s most recent take on a D&D Miniatures Skirmish game. Each miniatures faction pack comes with a full complement of creatures and order cards to play with. Although new faction packs are in the pipeline, many of us have been collecting D&D miniatures for years and will invariably want to create our own creatures. Although the art of balancing a creature/warband is known only to the designers, I’ve crunched a few numbers to get aspiring custom creature creators something to start with. This information is based on the first three available sets, Sting of Lolth, Heart of Cormyr, and Tyranny of Goblins.
Levels
Creatures range in level from 1 to 6. For Sting of Lolth and Heart of Cormyr, the total level of all creatures in a band combined is 34. For Tyranny of Goblins it is 36. The individual breakdown of levels varies between the two sets (see table below).
Number of Creatures
The three released sets all have 12 creatures each, with two in each set being duplicated (so ten unique creatures in a set).
Baseline Stats
In general, the average stats for a creature of a given level appear to be as follows:
Hit Points: 20 * level
Melee Damage: 10 * level
Speed: 6
Powers
Most creatures (9 out of 12 in a pack) have a special ability. Very few have two powers (one creature in Sting of Lolth, two in Heart of Cormyr; all of them level 4 or higher) or three powers (one in Tyranny of Goblins). Currently, powers that do additional damage, heal, or prevent damage, generally only do 10 hit points worth (though some powers can affect multiple creatures).
Balance
Balancing powers/stats so that a creature isn’t broken is probably as much an art as a science. In general, most creatures seem to make tradeoffs among their own abilities, increasing hit points at the expense of damage, for instance. If a creature has a power that does melee damage, it might deal less melee damage with its basic attack. The tradeoffs among other stats/powers is less obvious. How are differences in speed balanced, or the number/type of stat the creature uses? Are creatures balanced only when compared to other creatures of their level, or are they balanced with respect to the entire warband the appear in? We may need to see a few more sets published before the answers to these questions can be teased out.
Warbands By The Numbers
Finally, here are some statistics about the three released warbands, Heart of Cormyr, Sting of Lolth, and Tyranny of Goblins. These numbers come only from the creatures themselves, not from any order cards.
| Heart of Cormyr | Sting of Lolth | Tyranny of Goblins | |
|---|---|---|---|
| Combined Hit Points: | 660 | 690 | 730 |
| Combined Melee Damage: | 230 | 220 | 210 |
| Combined Missile Damage: | 90 | 60 | 40 |
| Creatures With Missile Attacks: | 5 | 4 | 2 |
| Speed 5 Creatures | 4 | 0 | 0 |
| Speed 6 Creatures | 4 | 7 | 9 |
| Speed 7 Creatures | 4 | 3 | 1 |
| Speed 8 Creatures | 0 | 1 | 2 |
| Speed 10 Creatures | 0 | 1 | 0 |
| Average Speed | 6 | 6.75 | 6.42 |
| Level 1 Creatures: | 3 | 2 | 3 |
| Level 2 Creatures: | 3 | 3 | 1 |
| Level 3 Creatures: | 2 | 3 | 4 |
| Level 4 Creatures: | 2 | 3 | 2 |
| Level 5 Creatures: | 1 | 1 | 1 |
| Level 6 Creatures: | 1 | 0 | 1 |
| Combined Level of Creatures | 34 | 34 | 36 |
| Creatures With Dex: | 5 | 12 | 7 |
| Creatures With Str: | 8 | 1 | 2 |
| Creatures With Int: | 2 | 1 | 1 |
| Creatures With Wis: | 1 | 1 | 0 |
| Creatures With Con: | 4 | 0 | 5 |
| Creatures With Cha: | 0 | 0 | 4 |
| Creatures With Two Skills: | 6 | 3 | 5 |
| Creatures With Three Skills: | 1 | 0 | 1 |
| Creatures With Powers That Do Melee Damage: | 3 | 3 | 3 |
| Combined Melee Damage From Powers: | 30 to 100 | 50 | 30 |
| Creatures With Powers That Do Ranged Damage: | 1 | 0 | 0 |
| Combined Ranged Damage From Power: | 20 to 120 | 0 | 0 |
| Creatures With Deploy Powers: | 1 | 2 | 1 |
| Creatures With Burrow/Fly: | 2 | 1 | 1 |
| Creatures With Slide Powers: | 1 | 1 | 0 |
| Creatures With Shift Powers: | 0 | 4 | 0 |
| Creatures With Heal/Reduce-Damage Powers: | 3 | 0 | 2 |
| Combined Healing/Damage-Reduction From Powers: | 30 to 100 | 0 | 20* to 100+* |
| Creatures With Powers That Tap Enemy: | 0 | 0 | 2 |
* Special ability grants Prevent 10 to creatures on board with certain keywords. Upper bound based on number of creatures in set.
DIY Miniature Terrain: Glowing Pillars
Pillars are a common feature in many dungeons and ruins, and magical pillars can provide an interesting terrain feature for encounters. I’ll show you how with a few supplies from your local craft store you can make great looking glowing pillars to enhance your next game.

To make four glowing blue pillars, you will need the following, all of which can be found at Michael’s craft stores:
Components
 Fillable Pillar Set
These are the core of the project. The columns themselves are almost exactly 1″ by 1″, which is perfect for D&D, though the top and base are larger (around 2″). Fortunately, they can be removed. The pillars come in 4″ and 6″ tall (I chose the 4″ for my purposes). Ashland Blue Submersible LED Lights 4 pack
To make the pillar glow, we need a light source, and these bright blue LEDs do the job nicely. Of course, if you want something other than blue pillars, look for another color LED instead. You’ll need lights that are no wider than ~1″ in diameter, and no taller than 3/4″. Liquid Water Gems, Blue
The trickiest part of this build was figuring out a way to get the column to actually “glow”. The LED needs something to illuminate otherwise it will just look like a clear plastic column with a light at the bottom. That’s where these water gems come in. These little spheres are made of a polymer that absorbs water, and will scatter the light we shine through them. Getting them in the same color as the LED enhances the overall effect.
Additional supplies you will need include:
- Plastic wrap (e.g. Saran Wrap)
- Electrical tape
- Four dimes
- Water
- Scissors
Build Instructions
- The submersible LEDs that we bought are too big to fit into the pillars as they are. Fortunately, they are easily taken apart. Simply grab a hold of the clear plastic top with one hand and the colored plastic bottom with the other, and twist the top counterclockwise. With some luck, it will unscrew, allowing you access to the LED light resting in the bottom piece. The light is part of a smaller plastic piece that also holds the batteries. Remove this whole piece (light and batteries, which I will call the “assembly” for easy reference), and put the plastic top and bottom aside (they won’t be used).

LED, Disassembled
- Take a plastic pillar and remove the top and bottom pieces. Notice that inside the pillar there are actually two cavities (it isn’t hollow completely through): a large area, and a small one. The small one is going to house our light.

Fillable Pillar, Disassembled
- Take the LED and battery assembly you removed from the submersible light housing and set it in the small section of the pillar so that the light points toward the larger section. You’ll probably want to put the batteries aside for now, if they haven’t already fallen out. It will be a tight fit, so you’ll probably need to set the pillar on a hard surface with the bottom of the light down and give it a good push from the top to get it in completely. Push firmly enough to get it in place, but don’t be too forceful or the plastic pillar may crack (no matter what you do, it will probably show some signs of fatiguing at the base).

Electrical Tape To Hide LED
- You can hide the light in the bottom by wrapping a length of electrical tape about 4″ long around the based of the pillar.
- Place the two batteries (CR2032) into the LED assembly such that the plus sign is facing away from the light. The original enclosure had a metal piece that was used to complete the circuit in the light by connecting the batteries to a small piece of metal sticking out of the bottom of the assembly. Because we’ve removed this piece, we need something else to close the circuit. My quick fix was to put a dime underneath the batteries to ensure a good connection. You may need to fiddle with the wire just a bit to make everything fit (but don’t bend it too much as it may break)

Batteries And Dime In Pillar. Note the metal wire. Dime shown here on top of batteries.
- To keep everything in place, wrap a 1 & 1/2″ piece of electrical tape across the bottom of the pillar. At this point, the LED should be lighting up. If it doesn’t, make sure your batteries are in correctly and the metal piece at the base of the assembly is making good contact. You may find that the contact isn’t good unless you stand the pillar upright, which is fine.

Taped In Place
- In order to disperse the light from the LED, we now fill the large cavity in the plastic pillar with the Liquid Water Gems. You may find a spoon is helpful here. Take your time, these little spheres are slippery and have a habit of escaping and bouncing their way to freedom. Fill the pillar to the top with water gems.

Water Gems
- To give the illusion that the pillar is mostly solid, slowly fill the pillar with water to about an inch from the top. Because of the properties of the water gems, they will appear to mostly disappear as they are covered in water.

Comparison of Gems (Left) and Gems With Water (Right)
- Cut a small piece of plastic wrap about 2″ square. Cover the top of the pillar with it so that it is even, wrapping it along the sides so it is flush.

Plastic Wrap Seal
- Finally, take one of the plastic caps of the pillar and slowly slide it over the top of the pillar, pulling the plastic wrap taught and sealing it. (Note: Although this will form a seal good enough to keep the water and gems from spilling everywhere, it’s not exactly water-tight. I don’t recommend resting these pillars on their side.) I left the bottom caps off of mine in order to fit nicely on a 1″ square grid (the bases being more like 2″).

Sealed In Place
- To turn the pillar light off, simply remove the tape from the bottom and take out the batteries.


Terrain Power
What’s a neat looking bit of 3D terrain without some crunch to back it up? Here’s an example of a fantastic terrain and terrain power that you can use in your game to go along with the glowing pillar:
Necrotic Crystal Pillar
Crystal pillars often resonate with power, sometimes enhancing what is already present in the environment, other times specifically attuned through ritual or magic to a particular energy. These crystals pulse with necrotic energy fueled by the Shadowfell and focused by unholy rites, imbuing those bathed in its light with the withering power of the dead and dampening the power of the divine.
Effect: All evil creatures within 20 squares of a pillar (or for sake of simplicity, within the same encounter area) gain +5 necrotic damage and resist 5 radiant damage. The effects of multiple pillars do not stack, but DMs could place several pillars in an area to challenge PCs to destroy them all to eliminate the effect. Any time necrotic damage is done as a result of this effect (or radiant damage resisted) a player can make an Insight Check (+2 if trained in Arcana) at a moderate DC for the encounter level as a free action to recognize the effect is coming from the pillars. Similarly, a player can actively study a pillar with an Arcana Check at a moderate DC to reach the same conclusion.
Usage: PCs can destroy a pillar to cancel the effect as well as shower their enemies in crystal shards (see Shard Explosion below). Crystal Pillars have the following stats:
HP: 15 AC: 4 REF: 12 FORT: 4 WILL: —
Immune: poison, psychic
Resist 10: acid, cold, fire, lightning, necrotic, radiant
Vulnerable: 5 force, 5 thunder
Single-Use TerrainShard Explosion
The crystal pillar explodes in a shower of shards.
Reaction
Requirement: A Crystal Pillar is destroyed.
Target: Each creature in close blast 2 (centered on pillar)
Attack: Encounter Level +3 vs. Reflex
Hit: Consult “Damage By Level” table for Two or More Targets for encounter level
Miss: Half damage.
Effect: The blast becomes an area of difficult terrain.
What To Do When Your Players Don’t Know What To Do
 Last month I presented some advice to players for what to do when they didn’t know what to do. As a Dungeon Master, it is important to remember that you are the lens through which your players perceive the game world. The story, the characters, the environments, the puzzles, the encounters, etc., they are all very well defined for you (and probably fresh in your mind from prepping) but most of it is new to the players. Details that are crystal clear in your mind may be muddy or convoluted to everyone else at the table, and what seems obvious to you may not even occur to them. New players don’t have the years of experience and exposure to gameplay tropes to help them figure out how to interact with the world. As their DM, you need to be able to recognize when players are stuck and facilitate getting them back on track. Here are some tips on how to do that:
Establish Your Receptiveness
When you start DMing for a group, particularly a group of new players, let them know that not only is it okay to ask questions, it’s encouraged. Let them know that they should feel comfortable speaking up if they are confused or uncertain how to proceed, and tell them it’s okay to admit when they don’t know what to do next. Let them know that although you will be revealing a certain amount of information up front (e.g. through “read-aloud text” or other descriptions), they shouldn’t necessarily assume that there isn’t more than can be learned.
For your first few sessions (or even in established games if there are long breaks between sessions), you may have to reiterate this message a few times before the players take it to heart. In the past I have done so as part of the pre-game prep and recap, but you can also bring it up when the table gets quiet or the players seem like they are uncertain as to how to proceed. Reminding them to ask questions in these cases gives them an immediate invitation to speak which can be particularly helpful for the more shy or inexperienced players, or the observer types, who normally aren’t inclined to chime in.
It’s also helpful to reinforce the idea that, as the DM, part of your job is to decide how to apply and enforce the rules. In a game as codified as 4th edition D&D, it’s sometimes hard not to think only in terms of what’s written down on the character sheet in front of you or spelled out in the Rules Compendium. Encourage them to think in terms of the actions and deeds of their character, not simply a list of skills or powers. Let them know that when in doubt, they should tell you what they want to do, and you will determine what game mechanics apply.
Recognize Confusion or Indecision and Address It Directly
It’s not too difficult to spot a player who is struggling with a decision at the table: furrowed brows, frantic poring over power cards and character sheets, general hemming and hawing, or just blank stares and silence, are all pretty clear indicators. How one handles this depends somewhat on the situation, but one thing to avoid is saying nothing at all: long, awkward silences at the table are uncomfortable, and as a player (particularly a new one) the feeling that the whole table is waiting on you to make a decision can be excruciating. Instead, ask questions of the players to spur them on.
The standard DM query is the well-worn, “What do you do?”, which works fine for indicating to the players that the next move is up to them, but isn’t as useful for eliciting responses at a quiet table or helping a confused player make a decision. In fact, in the latter case it can come off as sounding impatient which may cause a player to shut down and choose the path of least resistance (“I guess I’ll doing nothing”) in order to get the focus off of them.
Offer Assistance To Perplexed Players
It seems obvious to say, but if a player looks confused or hesitant, sometimes the best way to handle it is by offering help. No need to beat around the bush, just simply come out and say, “You seem uncertain of what to do, how can I help? What are you unsure about? What information would help you decide how to proceed?” This allows the player to vocalize their thought process and give you the opportunity to feed them useful information (either directly or as the result of skill checks).
A player poring over his or her character sheet is often either trying to find a skill or power they think could apply to a situation, or already knows what they want to try but don’t know how to do it in the context of the game rules. Sometimes it is sufficient to ask them, “What is it that you are trying to accomplish?” to get enough information to continue play. Other times, you need to decouple them from the game mechanics for a moment to let them problem-solve without worry about how the rules will apply (that’s your job after all). Tell them to forget about their character sheet and powers for the time being and think about what they (or, more specifically, their character) would do in that situation. Free from worrying about rules or mechanics, the player can concentrate on the problem before them, and you can now offer advice based on what they want to accomplish.
Pay Attention To What Your Players Are Saying
DMs should be ready to key off what the players are saying out loud as they work out problems. If they say “I wonder if this item is magic?” or “Do you think they’d build a back door into their lair?” you can prompt them for an Arcana or Dungeoneering check. Readily responding to what players say–particularly when talking amongst themselves or thinking aloud–in ways that allow them to gain information can reinforce the importance of asking questions and encourage them to think about problems in a realistic (as opposed to mechanical) way.
Focus Their Attention With A Pointed Recap
I some cases, groups aren’t sure of how to proceed because they’ve forgotten what it is they set out to do (particularly at the start of a session after a long break). They may have lost sight of their ultimate goal, or they may need a reminder of their immediate motivations. A brief, but descriptive, summary of the party’s current condition, interjected when the table is indecisive, can move the game along nicely. For example: “You’ve caught your breath and tended to your wounds. Around you a half score of enemies lies vanquished, but you know more may be coming if you tarry too long. Somewhere deeper within the complex lies the ancient artifact you seek. The door to the north lies open, but those to the south remain closed. How will you proceed?”
Enumerate Their Options
Obviously you don’t want to lead your players by the hand, but faced with limitless options, many players choose to do nothing. An indecisive group can be helped along by providing a list of possible avenues to pursue, giving them something to focus on. This doesn’t have to be blatant (“Do you go north or south?”), it can be woven into the narrative: “The last of the goblin war party is finally slain. Will the adventurers stay here for the night or push on toward their ultimate goal? And if so, will they continue south the way they have been traveling, or take the eastern route that seems less-traveled?” Of course, options are not always about which direction to travel or which door to open: “The Goblin Chief seems unwilling to make a bargain. Careful diplomacy may sway him, but then again a creature such as he might be more motivated by fear. Or gold. Or an axe in his head.”
Engage Timid Players
In any group there are usually one or two people that will generally set the course for the group, with others content to follow their lead. This often arises out of necessity and as a result of the mix of personalities at the table. Shy and/or new players may be perfectly content to let others make the decisions, but as the DM you are in a position to draw them out a little and engage them. When the party is mulling over options, or perhaps when one or more members have announced what they plan to do, consider directly addressing a quieter player and asking what their character is doing at the time. The goal is not to single them out, but rather to give them the opportunity to get involved without them feeling like they are taking the lead or deciding for the group. It can be as simple as “And what is your character up to?” or it can be more geared toward encouraging that player to step into character. For example: “And how does Krusk, brave Barbarian of the Northlands, feel about the situation? What do his keen instincts tell him?” Some players may not like being put on the spot, so don’t press the issue if they are uncomfortable, but it may help draw out others or at least give them a chance to express themselves.
Go Forth And Facilitate
Be receptive to questions, keep an eye out for players who may be struggling, address indecision directly, offer assistance, pay attention to what your players are saying, focus their attention, enumerate their options, and engage the timid. Armed with these tips you should be better equipped to handle those situations when your players aren’t quite sure what to do next.
Player Advice: What To Do When You Don’t Know What To Do
 In Dungeons & Dragons, much like in the real world, there are times when you may find yourself struggling with what to do next. You may be confounded by the plot or unsure as to what thread to follow. You may be in a situation where you just aren’t sure how to tackle the obstacles before you. This can be uncomfortable or frustrating, especially for new players, but it doesn’t have to be. Here are a few tips for what to do when you don’t know what to do:
Ask Questions
Questions are the currency of a D&D session. DMs ask questions (“What do you do?”) to elicit action and facilitate the flow of a game. Players should ask questions–of the DM, of the other players, of themselves–to realize the nature of their character’s situation, environment, and world. It seems like obvious advice, but asking questions is really the best way to gain insight into the game world. Newer players may feel intimidated but shouldn’t: Keep in mind, in most instances the DM has more information in his notes than what he initially reveals. Most DMs don’t divulge everything up front, they parcel out information based on what the PCs say and do.
The types of questions you should ask depend on the type of information you need. Basic questions such as “What can I see?” or “What do I hear?” are good if you are having trouble envisioning the game world, but are probably too vague to help you if you’re stuck. Being more specific can help you focus your attention in the right areas or uncover information that may help you: “Does it look like there’s a way to stop the ritual?”, “Does the baron seem like he’s being genuine?”, “Do the statues seem significant or familiar at all?”, etc.
Think Out Loud
Thinking out loud provides a way for you to vocalize your thought process, which for some is a helpful problem-solving technique. In addition to focusing your train of thought and allowing you to step through a solution, it also lets the other players know what you’re thinking. They may know something that you don’t and can offer input if you express it (and vice versa). The simple process of stepping through a situation or problem out loud can spark insights among you and your fellow players that could provide valuable. And, of course, it’s always helpful when everyone is on the same page.
Consider the fact, too, that while players are thinking out loud or trying to work out something among them, a good DM is listening to how his players are interpreting the game world. Based on what he hears, the DM can decide what information he needs to dole out to facilitate the game. Just by talking out a problem or situation, the DM may decide to ask for a few skill checks and reveal additional information based on those checks.
Put Yourself In Your Character’s Boots
Although Dungeons & Dragons is a roleplaying game, it is still a game and it can be easy to get caught in the trap of looking to your character sheet whenever you want to do something. But thinking in character, or answering the question “What would I do if I was really in this situation?” can help spark ideas and lead to lines of thinking that may be more helpful or fruitful than poring over a list of skills or powers. Consider the following scenario: A character finds a flask on the bones of a dead adventurer. The DM doesn’t immediately say what it is. The player scans her skill list, but obviously there is no “Identify Potion” skill. She thinks about what she might do if she found herself in this situation, and decides “I uncork the bottle, take a sniff, and maybe a tiny sip.” The DM tells her she recognizes it as a Potion of Healing (or perhaps asks for an Arcana Check and gives her more or less information based on the result). By simply putting herself in her character’s shoes, the player found an easy solution to her problem.
Don’t let your character sheet or specific rules limit your thinking. Your skills and powers, and the rules as written, are there to help adjudicate actions, not necessarily limit them. You should approach challenges in game with what you want to accomplish (and/or how) first, and then let the DM interpret how that fits within the game’s framework.
Don’t Be Afraid To Admit You Don’t Know What To Do
This is something that’s probably difficult for many players to do, regardless of their experience level. You may not be comfortable with admitting you’re confused, or don’t want to appear clueless, or maybe you’re afraid that you’ll offend the DM in some way. You might be tempted to keep quiet and defer to other players to move the action or story, but this just diminishes your gaming experience. Instead, tell your DM and fellow players that you’re at a loss for what to do. If you are confused about the plot or story details, the DM can refresh your memory or clarify the important points. If you don’t know what to do next to fulfill your quest, saying as much can get the table talking about how everyone wants to proceed (and clue the DM in on the fact that perhaps he needs to offer a little nudge in the right direction). If it is a matter of you not knowing how to overcome the obstacle you’re facing, the DM may ask you to think about what it is you want to accomplish and then offer some suggestions as to courses of action.
Simply admitting that you don’t know what to do is the most direct way to deal with the problem. It lets the DM know that you’re stuck and helps avoid awkward silence and blank stares at the table. It often benefits the entire group, especially if others feel the way you do, and can help ensure that every player is on the same page
Go Forth And Meet Your Challenges Head On
Ask questions, think out loud, put yourself in your character’s boots, and don’t be afraid to admit when you don’t know what to do. Armed with these tips you should be better equipped to handle those situations when you aren’t quite sure what to do next.
DMs: Check out my follow up article on what to do when your players don’t know what to do.
